

Mistakes to Avoid as First Time Trekker
We've all been there – dreaming about our first epic trek, scrolling through stunning mountain photos, and feeling that irresistible pull toward adventure. At Luxury Holiday Nepal, we've guided countless first-time trekkers through Nepal's breathtaking trails, and we've noticed the same mistakes happening over and over again.
First-time trekkers often dive headfirst into planning without realizing how different mountain adventures are from regular hiking. We see excited adventurers show up with completely wrong gear, unrealistic expectations, and preparation gaps that could turn their dream trip into a nightmare.

That's exactly why we created this guide. We want to share the most common mistakes to avoid as first time trekker, so you can focus on soaking up those incredible mountain views instead of dealing with preventable problems.
We'll walk you through the biggest physical preparation blunders that leave trekkers struggling on day one, plus the gear selection disasters that can make or break your entire experience. We'll also cover the route planning oversights that catch newbies off guard and the health and safety mistakes that put trekkers at unnecessary risk.
Ready to turn your first trekking adventure into the amazing experience it should be? Let's dive into what you need to know.
Physical Preparation and Fitness Blunders
Underestimating Cardiovascular Endurance Requirements
Most of us jump into trekking, thinking our weekend jogs around the neighborhood will cut it. We couldn't be more wrong. When we're climbing steep mountain trails for 6-8 hours daily, carrying a heavy backpack while breathing thinner air, our cardiovascular system faces demands we've never experienced before. We've seen countless first-time trekkers struggle after just the first few hours because they didn't prepare their hearts and lungs properly.
Building proper cardiovascular endurance takes time - we're talking about 8-12 weeks of consistent training before your trek. We recommend mixing different types of cardio exercises: long, steady hikes on weekends, interval training during the week, and stair climbing with a weighted pack. Swimming also works wonders for lung capacity. The goal isn't just getting your heart rate up; we need to train our bodies to sustain moderate effort for hours without breaking down.
Neglecting Strength Training for Legs and Core
We often focus so much on cardio that we forget about the muscles doing the heavy lifting. Our legs carry us up those steep inclines, while our core keeps us stable on uneven terrain. Without proper strength in these areas, we risk injury and exhaustion within the first few days.
Squats, lunges, step-ups, and calf raises should become our best friends. We need to work on both explosive power for steep climbs and endurance for long descents. Our core muscles - not just abs, but the entire trunk - help us maintain balance when crossing streams, navigating rocky paths, or dealing with strong mountain winds.
| Exercise Type | Weekly Frequency | Key Benefits |
| Squats & Lunges | 3-4 times | Quad and glute strength |
| Step-ups | 2-3 times | Hiking motion simulation |
| Planks & Core work | Daily | Stability and balance |
| Calf raises | 3-4 times | Ankle strength for uneven terrain |
Failing to Practice with a Loaded Backpack
We can't stress this enough - training with the actual weight we'll carry makes all the difference. Many of us practice hiking with a light daypack or no pack at all, then struggle when we suddenly add 15-20 pounds of gear. Our balance shifts, our posture changes, and muscles we didn't know existed start screaming for mercy.
Start training with a loaded pack at least 6 weeks before your trek. Begin with lighter weights and gradually increase to match what you'll carry on the mountain. We should practice walking uphill, downhill, and on uneven surfaces with our pack. This helps us adjust our stride, learn how to shift weight properly, and identify any hot spots or pressure points that need addressing.
The pack weight also affects our breathing and energy expenditure. What feels comfortable for 30 minutes can become torture after several hours. We need to train our bodies to handle this sustained load while maintaining good form and avoiding injury.
Ignoring Altitude Acclimatization Preparation
Altitude hits everyone differently, and we can't predict how our bodies will react until we're up there. Many first-time trekkers assume they'll just "tough it out" or that their sea-level fitness will transfer directly to high-altitude performance. We've learned the hard way that altitude doesn't care how fit we are at sea level.
Above 8,000 feet, our bodies start working with significantly less oxygen. Headaches, nausea, fatigue, and sleep problems become common. We can't completely replicate high-altitude conditions at sea level, but we can prepare our bodies to use oxygen more efficiently.
Training methods we swear by include:
-
High-intensity interval training to improve oxygen uptake
-
Breath-holding exercises to increase lung efficiency
-
Training at higher elevations when possible
-
Practicing breathing techniques we'll use on the mountain
We also research our specific trek's altitude profile and plan rest days accordingly. Understanding the signs of altitude sickness and having a descent plan isn't just smart - it's potentially life-saving. Many trekking companies now offer pre-trek consultations to discuss altitude preparation, and we always take advantage of these resources.
Gear Selection and Packing Mistakes
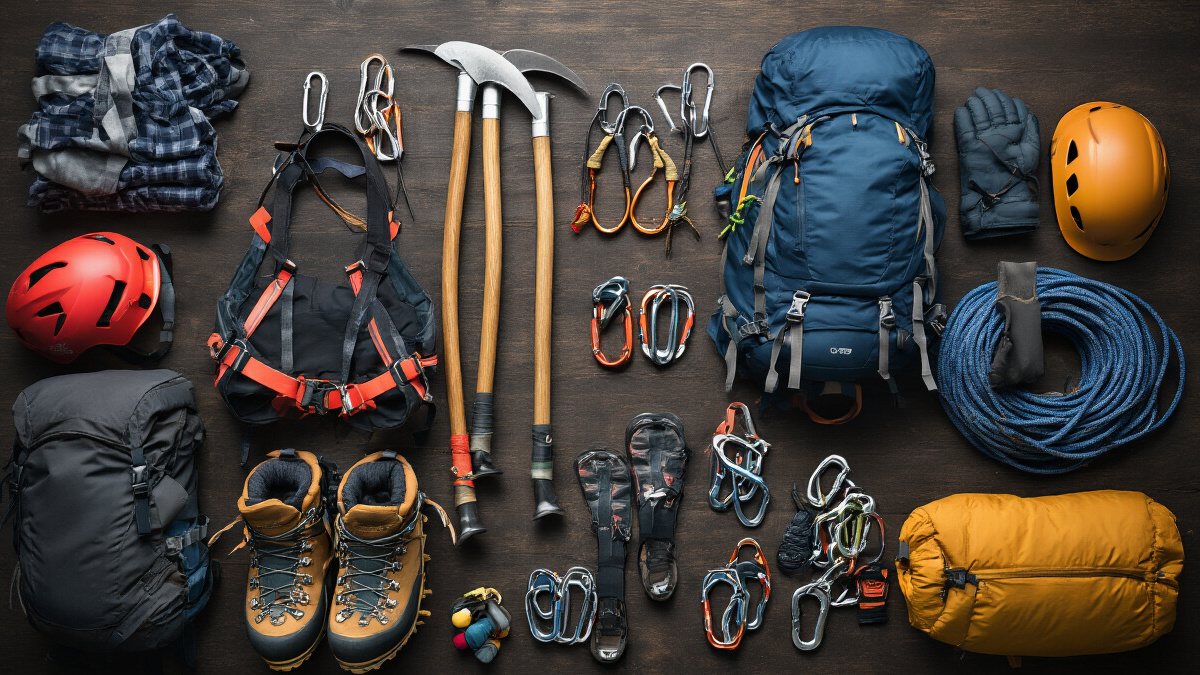
Overpacking Unnecessary Items That Add Weight
We've all been there – standing in front of our gear pile, convinced we need that extra pair of socks "just in case" or that heavy camping chair for comfort. The truth is, overpacking is one of the most common mistakes we make as first-time trekkers. Every extra pound on our backs becomes a burden when we're climbing steep trails at high altitude.
We recommend following the rule of thumb: if you can't justify why you need an item for safety, warmth, or essential function, leave it behind. That third book, multiple backup phone chargers, or "emergency" snacks beyond what's needed, will only slow us down. We should aim to keep our pack weight at 10-15% of our body weight for comfortable trekking.
Before packing, we need to lay everything out and ask ourselves: "Will I definitely use this?" If the answer isn't a clear yes, it stays home. We can also share items with our trekking partners – there's no need for everyone to carry their own first aid kit or repair tools.
Choosing Inappropriate Footwear for Terrain
Our feet are our foundation on the trail, and picking the wrong shoes can turn an amazing trek into a painful nightmare. We often see first-time trekkers showing up in brand-new hiking boots or, worse, regular sneakers for challenging mountain terrain.
The key is matching our footwear to the specific demands of our trek. For rocky, uneven terrain with potential stream crossings, we need sturdy hiking boots with good ankle support and aggressive tread. For well-maintained trails, hiking shoes or trail runners might work perfectly fine.
We should never, ever wear new boots on a trek. Breaking them in requires at least 50-100 miles of hiking to avoid blisters and hot spots. We recommend buying our trekking boots at least two months before departure and wearing them on progressively longer hikes.
Here's what we need to consider:
-
Terrain type: Rocky vs. smooth trails
-
Weather conditions: Wet vs. dry environments
-
Load weight: Heavy packs require more ankle support
-
Personal preferences: Some of us prefer lightweight, others want maximum protection
Selecting Poor Quality or Inadequate Clothing Layers
Mountain weather changes faster than we can blink, and wearing cotton or inadequate layers can put us in serious danger. We've learned the hard way that proper layering isn't just about comfort – it's about survival.
The layering system we swear by includes:
Base Layer: Moisture-wicking synthetic or merino wool materials that keep sweat away from our skin. Cotton kills in cold, wet conditions because it holds moisture and loses all insulating properties.
Insulating Layer: Fleece, down, or synthetic insulation that traps warm air. We need something we can easily add or remove as our body temperature changes during the day.
Shell Layer: Waterproof, breathable jacket and pants that protect us from wind and precipitation. This outer layer should have full zippers and ventilation options.
We also need to consider extremities – quality gloves, a warm hat, and moisture-wicking socks are non-negotiable. Cheap gear fails when we need it most, so we invest in reliable brands known for their performance in harsh conditions.
Forgetting Essential Safety Equipment
Safety gear isn't optional, yet we're amazed how many first-time trekkers skip essential items to save weight or money. These oversights can turn minor problems into life-threatening situations.
Our non-negotiable safety checklist includes:
| Essential Item | Purpose | Why Critical |
| First Aid Kit | Treat injuries/illness | Prevents minor issues from becoming major |
| Headlamp + Extra | Navigation in dark | Primary light source failure backup |
| Emergency Whistle | Signal for help | Sound travels farther than voice |
| Water Purification | Safe drinking water | Prevents waterborne illness |
| Emergency Shelter | Protection from elements | Hypothermia prevention |
| Navigation Tools | Route finding | GPS/phone batteries die |
We never assume our guide or group will have backup safety equipment for us. Taking personal responsibility for our safety means carrying our own essential items, even on guided treks.
Bringing Untested Gear on the Trek
Nothing ruins a trek faster than discovering our "perfect" new gear doesn't work as expected. We call this the "maiden voyage mistake" – using equipment for the first time in challenging conditions.
Every piece of gear we bring should be tested thoroughly at home or on shorter practice hikes. This includes:
-
Backpack fit and comfort: Load it with full trek weight and hike for several hours
-
Tent setup: Practice in various conditions, including wind and rain
-
Stove operation: Make sure we can operate it with cold hands and understand fuel requirements
-
Water filtration system: Test flow rate and effectiveness with different water sources
-
Clothing combinations: Wear our layering system in varying temperatures
We recommend doing at least three practice hikes with our complete gear setup before departure. This helps us identify any issues with fit, function, or compatibility between different pieces of equipment. We'd rather discover problems in our local park than halfway up a mountain in Nepal.
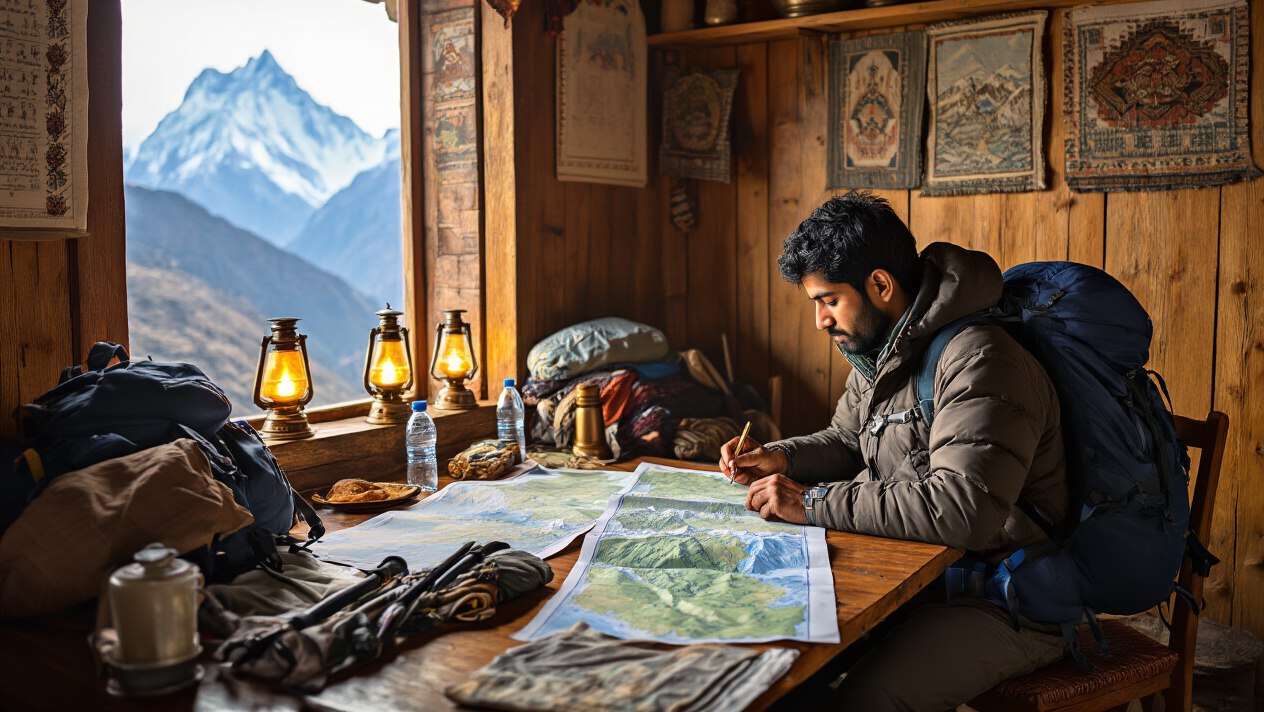
Route Planning and Research Failures
Inadequate Study of Trail Difficulty and Conditions
We see far too many first-time trekkers who dive into their adventure without properly understanding what they're getting into. Reading trail descriptions like "moderate difficulty" or "challenging terrain" isn't enough - we need to dig deeper into the actual conditions we'll face on the ground.
Many of us make the mistake of relying solely on basic trail ratings without investigating the specific challenges each route presents. A trail marked as "moderate" might include steep rocky sections, river crossings, or altitude gains that could prove overwhelming for beginners. We should research elevation profiles, typical trail surfaces, and common obstacles before committing to any route.
Weather conditions dramatically change trail difficulty too. What seems manageable in dry conditions can become treacherous during monsoon season or winter months. We've learned that checking recent trail reports from other trekkers provides invaluable insights into current conditions that guidebooks simply can't capture.
Underestimating Time Requirements for Daily Stages
We consistently see new trekkers underestimate how long each day's walk will actually take. The planning mistake here goes beyond just looking at distances on a map - we need to factor in our fitness level, rest breaks, photo stops, and unexpected delays.
Those estimated walking times we find online are usually based on experienced trekkers moving at a steady pace. As beginners, we should add at least 20-30% more time to any published estimates. We also need to account for:
-
Acclimatization breaks - Especially important at higher altitudes
-
Weather delays - Rain, fog, or snow can slow progress significantly
-
Trail conditions - Muddy paths, fallen trees, or damaged bridges extend travel time
-
Group dynamics - Moving as a group means accommodating the slowest member
We recommend planning shorter daily stages for our first trek rather than pushing ourselves to cover ambitious distances.
Ignoring Weather Patterns and Seasonal Considerations
Weather patterns make or break trekking experiences, yet we often overlook this critical planning element. Each trekking region has distinct seasons that dramatically affect trail conditions, visibility, and safety.
In Nepal's Himalayas, for example, we need to understand that monsoon season (June-September) brings heavy rainfall, leeches, and poor mountain views. Post-monsoon (October-November) offers clear skies but crowded trails, while winter months present extreme cold and potential trail closures at higher elevations.
We should research specific weather patterns for our chosen destination and time of year. This includes:
| Season | Typical Conditions | Considerations |
| Pre-monsoon | Warmer, dusty, occasional storms | Good visibility but hazy views |
| Monsoon | Heavy rain, cloudy, humid | Dangerous river crossings, poor views |
| Post-monsoon | Clear, dry, cool | Best visibility but crowded |
| Winter | Cold, snow at altitude, clear | Limited daylight, gear requirements |
Failing to Research Permits and Regulations
We can't stress enough how important it is to understand permit requirements before starting our trek. Different regions, national parks, and conservation areas have varying permit systems that we must navigate properly.
Some areas require multiple permits - perhaps both a national park entry permit and a special trekking permit. Others have restricted access requiring registered guides or specific entry points. We've seen trekkers turned away at checkpoints because they didn't have proper documentation.
Key permit considerations include:
-
Application timeframes - Some permits require advance booking
-
Required documents - Passport photos, copies, and specific forms
-
Validity periods - Many permits have expiration dates
-
Renewal requirements - Longer treks may need permit extensions
-
Group vs individual permits - Different rules for solo trekkers
We should also research local regulations about camping, waste disposal, and cultural sensitivities. Many regions have specific rules about where we can camp, how we dispose of waste, and appropriate behavior around local communities and religious sites.
Health and Safety Oversights
Neglecting proper travel insurance coverage
We've seen too many first-time trekkers skip travel insurance or choose the cheapest option without reading the fine print. This decision can turn a dream adventure into a financial nightmare. When trekking in remote areas, medical evacuation costs can easily reach $50,000 or more, especially if helicopter rescue is needed from high altitudes.
Our experience shows that basic travel insurance often excludes high-altitude activities or has altitude limits that don't cover popular trekking destinations. We always recommend policies that specifically cover trekking activities up to your planned maximum elevation. Look for coverage that includes emergency evacuation, medical treatment abroad, trip cancellation, and equipment loss or damage.
Essential Coverage Checklist:
-
Emergency medical evacuation (helicopter rescue)
-
Medical treatment up to your trekking altitude
-
Trip cancellation and interruption
-
Lost or damaged gear replacement
-
Coverage for pre-existing medical conditions
We recommend getting insurance quotes from specialized adventure travel insurers rather than standard vacation policies. Many trekkers discover too late that their regular insurance won't pay for mountain rescue operations or treatment in remote locations.
Inadequate first aid knowledge and supplies
Most first-time trekkers pack a basic first aid kit without understanding how to use half the items inside. We've witnessed situations where simple knowledge could have prevented minor issues from becoming serious problems. Knowing how to treat blisters, cuts, sprains, and altitude-related symptoms can make the difference between continuing your trek and ending it early.
Our first aid kit recommendations go beyond Band-Aids and pain relievers. We include blister treatment supplies, elastic bandages, antiseptic wipes, altitude sickness medication, anti-diarrheal medication, and electrolyte supplements. More importantly, we ensure our trekkers know how to use everything in their kit.
Must-Have First Aid Skills:
-
Proper blister prevention and treatment
-
Recognizing and treating altitude sickness symptoms
-
Basic wound cleaning and bandaging
-
When to turn back vs. when to push forward
-
How to use a thermometer and assess vital signs
We strongly suggest taking a wilderness first aid course before your first major trek. These courses teach practical skills for situations where professional medical help is hours or days away. Online courses are available, but hands-on training provides confidence that online learning can't match.
Ignoring altitude sickness warning signs
Altitude sickness doesn't discriminate – we've seen incredibly fit athletes struggle while less athletic trekkers adapt easily. The mistake many first-timers make is pushing through symptoms instead of recognizing warning signs and responding appropriately. Altitude sickness can progress from uncomfortable to life-threatening quickly, especially above 8,000 feet.
We teach our trekkers to recognize the early symptoms: headaches, nausea, fatigue, dizziness, and difficulty sleeping. These symptoms might seem manageable, but ignoring them can lead to High Altitude Pulmonary Edema (HAPE) or High Altitude Cerebral Edema (HACE), both potentially fatal conditions.
Altitude Sickness Warning Signs:
| Mild Symptoms | Serious Symptoms | Emergency Signs |
| Headache | Severe headache not relieved by medication | Confusion or altered mental state |
| Mild nausea | Vomiting | Difficulty walking straight |
| Fatigue | Loss of appetite | Shortness of breath at rest |
| Dizziness | Difficulty sleeping | Fluid in lungs (crackling sounds) |
Our golden rule is simple: don't ascend with symptoms, and descend if symptoms worsen. We've guided trekkers who wanted to push through "just a headache" only to realize they were experiencing early altitude sickness. The mountains will always be there – your health and safety come first.
Poor hydration and nutrition strategies
Dehydration happens faster at altitude, yet many first-time trekkers don't adjust their water intake accordingly. We see trekkers rationing water to avoid carrying weight or frequent bathroom breaks, not realizing that dehydration worsens altitude sickness symptoms and reduces physical performance significantly.
Our hydration strategy involves drinking before you feel thirsty and monitoring urine color as a hydration indicator. Clear to light yellow indicates good hydration, while dark yellow signals dehydration. At altitude, we recommend drinking 3-4 liters of water daily, plus additional fluids during meals.
Daily Hydration and Nutrition Guidelines:
-
Start each day with 16-20 oz of water
-
Drink 6-8 oz every 15-20 minutes during trekking
-
Include electrolyte supplements, especially on longer days
-
Eat frequent small meals rather than large portions
-
Focus on complex carbohydrates for sustained energy
-
Pack high-energy snacks for quick fuel
Nutrition mistakes are equally common. We've watched trekkers survive on energy bars and candy, then wonder why they feel weak and sluggish. Your body needs balanced nutrition to perform at altitude. We emphasize eating regular meals even when appetite decreases, which commonly happens above 10,000 feet.
Proper meal timing matters too. We eat breakfast early, pack substantial snacks, and don't skip meals even when tired. The combination of physical exertion, altitude, and weather demands consistent fuel. Many trekkers underestimate how much energy their bodies need and end up depleted halfway through their journey.
Budget and Booking Errors
Underestimating Total Trekking Costs
We've seen countless first-time trekkers fall into the trap of focusing only on the obvious expenses like permits and guide fees, completely missing the bigger financial picture. When we plan our first trek, we often forget about those sneaky additional costs that can quickly balloon our budget by 30-50%.
Beyond the basic package price, we need to account for gear purchases or rentals, travel insurance, visa fees, international flights, and domestic transportation to trail heads. Personal expenses like snacks, drinks, WiFi charges, hot showers, and charging devices at tea houses add up faster than we expect. Tips for guides and porters are mandatory cultural practices that we must factor in - typically 10-15% of our total service cost.
Emergency evacuation insurance and potential helicopter rescue costs can reach thousands of dollars. We've learned that altitude sickness or unexpected weather can force expensive changes to our plans. Many trekkers end up spending an extra $500-800 above their initial budget because they didn't plan for contingencies.
| Expense Category | Typical Cost Range | Often Overlooked |
| Gear & Equipment | $300-800 | Rental vs. purchase decisions |
| Personal Expenses | $20-40/day | Tea house extras, snacks |
| Tips & Gratuities | 10-15% of service | Cultural expectation |
| Emergency Buffer | $500-1000 | Medical evacuation |
Choosing Unreliable Tour Operators or Guides
We can't stress enough how critical this decision is for our safety and overall experience. The allure of rock-bottom prices often leads us straight into the arms of unscrupulous operators who cut corners on safety, equipment quality, and guide training.
Reliable operators invest in proper guide certification, insurance coverage, and emergency protocols. When we choose based solely on price, we risk ending up with undertrained guides who lack wilderness first aid certification or adequate knowledge of high-altitude medicine. We've witnessed situations where inexperienced guides made dangerous decisions during weather emergencies or failed to recognize altitude sickness symptoms.
Legitimate operators maintain transparent pricing, provide detailed itineraries, and have verifiable references from previous clients. They're registered with local tourism boards and carry proper insurance. Red flags include operators who refuse to provide written contracts, demand full payment upfront, or have no physical office address.
Warning signs of unreliable operators:
-
Prices are significantly below the market average
-
No online reviews or verifiable testimonials
-
Pushy sales tactics and pressure for immediate payment
-
Vague itineraries without contingency plans
-
Unwillingness to discuss guide qualifications
-
No emergency contact protocols or insurance coverage
Booking Accommodations Without Proper Research
We often make the mistake of assuming all mountain lodges and tea houses offer the same basic amenities and standards. This assumption can lead to uncomfortable nights, poor hygiene conditions, and missed opportunities for better experiences along our route.
Different regions have varying accommodation standards, and peak season availability can be extremely limited. We need to understand that popular routes like Everest Base Camp or Annapurna Circuit require advance bookings during high seasons (March-May and September-November). Tea houses at higher altitudes offer more basic facilities, and we should prepare accordingly.
Some accommodations charge separately for hot showers, WiFi, charging devices, and even blankets. Room sharing is common, and private rooms cost significantly more. We've learned to research specific lodges along our planned route, read recent reviews, and understand their policies on food, heating, and basic amenities.
Key accommodation research points:
-
Seasonal availability and booking requirements
-
Included vs. additional charges for basic services
-
Hygiene standards and bathroom facilities
-
Heating options and blanket policies
-
Food quality and dietary accommodation options
-
WiFi availability and charging station access
Failing to Budget for Emergency Expenses
Emergency situations in remote mountain areas can drain our finances faster than any other aspect of trekking. We need to prepare for scenarios that might require immediate financial resources, often at premium prices due to location and urgency.
Medical emergencies are the biggest concern, with helicopter evacuations costing $3,000-5,000 per flight. Even minor injuries or altitude sickness can require expensive treatment at private clinics in gateway towns. Weather delays can extend our trip by several days, requiring additional accommodation, food, and guide fees.
Equipment failures happen regularly in harsh mountain environments. Replacing critical gear like boots, sleeping bags, or rain gear at mountain prices costs 2-3 times normal retail prices. We might also need to hire additional porters or change our route entirely, leading to unexpected costs.
Smart trekkers maintain an emergency fund equivalent to at least 25% of their total trip budget. This buffer covers medical treatment, evacuation insurance deductibles, extended stays due to weather, and essential gear replacement. We should keep some cash accessible since remote areas don't accept cards, and ATMs are scarce or unreliable.
Emergency expense categories:
-
Medical treatment and evacuation costs
-
Weather-related delays and extended stays
-
Critical gear replacement at mountain prices
-
Route changes and additional porter fees
-
Communication and coordination costs during emergencies
Mental Preparation and Expectation Management
Setting unrealistic goals for the first trek
We've watched countless first-time trekkers bite off more than they can chew, setting themselves up for disappointment and potential danger. Many newcomers dream of conquering Everest Base Camp or the Annapurna Circuit without considering their actual fitness level or experience. We strongly recommend starting with shorter, less demanding treks to build confidence and skills.
A common mistake we see is planning overly ambitious daily distances. New trekkers often underestimate how challenging mountain terrain can be, assuming they can cover the same ground as experienced hikers. We suggest beginning with treks that cover 8-12 kilometers per day rather than pushing for 15-20 kilometers.
Realistic First Trek Goals:
-
Choose 3-5-day treks initially
-
Target moderate altitude gains (below 3,500 meters)
-
Plan for 4-6 hours of walking daily
-
Select well-established routes with good infrastructure
Underestimating the mental challenges of long distances
The psychological toll of multi-day trekking catches many first-timers off guard. We've seen trekkers who are physically prepared struggle with the mental demands of walking for hours each day, especially when weather conditions turn harsh or scenic views become repetitive.
Isolation from modern conveniences creates unexpected stress for many newcomers. Without constant connectivity, entertainment, or comfort foods, we often witness trekkers experiencing anxiety or homesickness. The repetitive nature of putting one foot in front of the other, day after day, requires mental stamina that many don't anticipate.
Sleep deprivation compounds these challenges. Basic mountain accommodations, altitude effects, and unfamiliar sleeping conditions can leave trekkers mentally foggy and emotionally vulnerable. We recommend preparing mentally by practicing mindfulness techniques and accepting that discomfort is part of the experience.
Mental Preparation Strategies:
-
Practice meditation or breathing exercises before your trek
-
Prepare for limited connectivity and entertainment
-
Set small daily goals instead of focusing only on the destination
-
Accept that some days will be harder than others
Lack of contingency planning for setbacks
We can't stress enough how important backup plans are for mountain adventures. Weather changes, altitude sickness, injuries, or equipment failures can derail even the best-planned treks. Yet we consistently meet first-timers who haven't considered what happens when things go wrong.
Many trekkers assume everything will go according to schedule, booking tight return flights or making rigid accommodation reservations. We've assisted numerous groups who faced serious problems because they had no buffer time for delays or route changes.
Emergency evacuation insurance often gets overlooked until it's desperately needed. We've seen trekkers face enormous medical bills or dangerous situations because they didn't plan for worst-case scenarios. Having comprehensive travel insurance that covers helicopter evacuation can be literally life-saving.
Essential Contingency Elements:
-
Build 2-3 extra days into your schedule
-
Research alternative routes and exit strategies
-
Carry emergency communication devices
-
Maintain emergency cash reserves
-
Know locations of nearest medical facilities
-
Have clear evacuation plans for serious altitude sickness
We always advise our trekkers to hope for the best but plan for challenges. Mountain conditions change rapidly, and flexibility often makes the difference between a memorable adventure and a dangerous situation.
We've walked through the most common pitfalls that can turn your dream trek into a nightmare. From underestimating the physical demands and packing the wrong gear to skipping crucial research and ignoring safety protocols, these mistakes can seriously impact your adventure. Poor budget planning and unrealistic expectations only add to the mix, creating stress when you should be enjoying the mountains.
The good news is that all of these errors are completely preventable with proper planning and honest self-assessment. Start preparing months ahead, invest in quality gear, research your route thoroughly, and set realistic expectations for yourself. Remember, your first trek should be about building confidence and falling in love with the mountains, not proving anything to anyone. Take our advice, prepare well, and you'll be setting yourself up for an incredible adventure that leaves you planning your next trek before you even get home.
If you need any further information, please contact us by email: [email protected], Phone: +977- 985 100 5129 (WhatsApp)


Tripadvisor
5.01050 reviewsGoogle
4.8137 reviewsFacebook
4.1 recommend44 ReviewsTrustpilot
4.1 Great(5 reviews)- Trusted by50K plus traveller